To create custom cards for your board game? You’re in the right place.
How to make cards for board games isn’t just about printing some images on paper. It’s about creating components that enhance gameplay, withstand repeated shuffling, and look professionally made.
I’ve spent countless hours designing and testing card components for games, and I’m going to share everything I’ve learned so you can skip the trial and error that cost me hundreds of dollars and dozens of ruined prototypes.
In this guide, as a professional custom board games manufacturer, I’ll walk you through the entire process from design to production. By the end, you’ll know exactly how to create cards that would make even veteran game designers jealous.
Let’s dive in.

Why Make Your Own Board Game Cards?
Before we get into the how, let’s talk about the why.
There are three main reasons people make their own game cards:
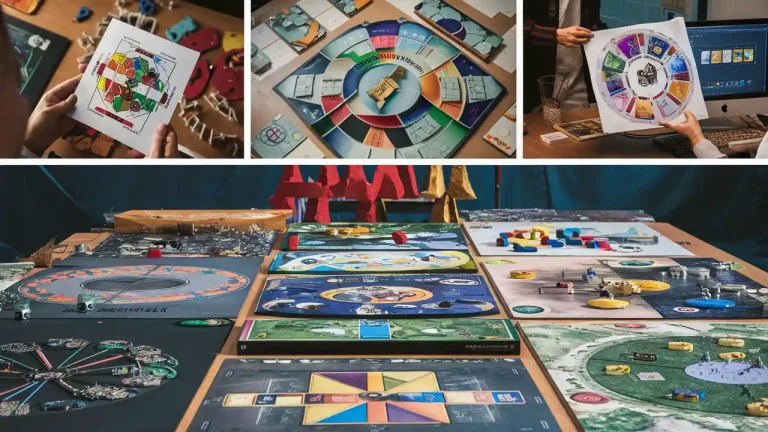
- You’re prototyping a new game. Every great game starts as a rough prototype. Creating cards yourself is essential for testing gameplay before investing in professional production.
- You’re upgrading or customizing an existing game. Maybe you want to replace worn-out cards or create a themed version of your favorite game.
- You’re producing a small print run. Perhaps you’re making a limited batch for a game jam, Kickstarter rewards, or small-scale distribution.
Here’s the thing:
The quality of your cards can make or break your game experience. Even the most brilliant mechanics will fall flat if players can’t shuffle the cards or if they can see through them.
How to Make Cards for Board Games
Essential Materials You’ll Need
Let’s talk about what you’ll actually need to make quality cards.
Cardstock
This is the foundation of your cards. Don’t skimp here.
For board game prototype cards, I recommend:
- 300gsm cardstock for final prototypes (this is the magic number for most games)
- 250gsm cardstock for early testing (slightly thinner, but still durable)
- Smooth, matte finish (reduces glare and feels better in hand)
Pro Tip: Always buy more cardstock than you think you’ll need. Trust me, mistakes happen and you’ll thank me later.
Design Software
You have several options depending on your skill level:
- Adobe Photoshop or Illustrator (industry standard, powerful but has a learning curve)
- Canva (beginner-friendly, has templates but limited customization)
- GIMP (free alternative to Photoshop)
- Nandy (specifically designed for card games, released in 2024)
Tools and Equipment
Here’s what you’ll need to finish your cards:
- Paper cutter (rotary cutters give the cleanest edges)
- Corner rounder (3mm radius is standard for most cards)
- Ruler and craft knife (for precision cuts)
- Sleeves or lamination pouches (for protection)
The entire setup will cost you between $50-200 depending on the quality you choose, but it’s an investment that pays off quickly if you’re making multiple games.
Designing Your Cards
This is where the magic happens. Let’s break it down into manageable steps.
1. Determine Card Size
Standard sizes include:
- Poker cards: 63.5mm × 88.9mm (2.5″ × 3.5″)
- Bridge cards: 57mm × 89mm (2.25″ × 3.5″)
- Mini cards: 41mm × 63mm (1.625″ × 2.5″)
- Tarot cards: 70mm × 120mm (2.75″ × 4.75″)
I’ve found that poker-sized cards work best for most games. They’re easy to handle and widely available in protective sleeves.
2. Create a Template
Start with a template that includes:
- Bleed area (3mm beyond the cut line)
- Safe zone (5mm from the edge for important elements)
- Consistent margins (for uniform appearance)
Here’s what your dimensions should look like for poker cards:
- Final card size: 63.5mm × 88.9mm
- Template with bleed: 69.5mm × 94.9mm
Every card should have consistent placement of:
- Card name/title
- Card type/category
- Main image or icon
- Card effect or text
- Any values or costs
- Border or frame
The best card game design maintains consistency while allowing each card to be instantly recognizable.
3. Design Principles to Follow
Remember these key principles:
- Readability comes first. Text should be visible from across the table (minimum 10pt font).
- Color-code different types of cards for quick identification.
- Use icons instead of text when possible for universal understanding.
- Create visual hierarchy to guide the eye to important information first.
Look at popular games like Magic: The Gathering or Dominion. Notice how you can understand a card’s function at a glance? That’s what you’re aiming for.
Printing Your Cards
You have two main options: DIY or professional printing.
Home Printing
If you’re making custom playing cards for personal use or early prototypes, home printing is the way to go.
Here’s how to get the best results:
- Use a laser printer if possible (more durable than inkjet)
- Print at 300dpi or higher resolution
- Use “best quality” settings in your printer properties
- Print a test page first to check alignment and colors
Pro Tip: Print on regular paper first, then hold it over your cardstock to see if everything looks right before using your expensive materials.
Professional Printing
For final versions or larger quantities, consider these options:
- The Game Crafter – Great for small runs, wide variety of sizes
- DriveThruCards – Good quality and reasonably priced
- MakePlayingCards.com – Excellent quality with many finishes
- PrintNinja – Better for larger print runs (500+ cards)
In 2025, many of these services offer rapid turnaround times of just 5-7 days for standard orders.
The cost comparison:
| Method | Cost per 54-card deck | Turnaround Time | Quality |
|---|---|---|---|
| Home Printing | $3-8 | Immediate | Low-Medium |
| Game Crafter | $8-12 | 1-2 weeks | Medium |
| MakePlayingCards | $15-20 | 2-3 weeks | High |
| PrintNinja | $5-8 (at 1000+ cards) | 4-6 weeks | Professional |
Cutting and Finishing Your Cards
This is where home-made cards usually fall short. Follow these steps for professional results:
Cutting Cards
- Stack no more than 5-8 sheets at once
- Make straight cuts first (top/bottom, then sides)
- Use a rotary cutter rather than scissors for clean edges
- Cut slightly inside the bleed area to avoid white borders
Rounding Corners
Round corners serve two purposes:
- They prevent corner damage during shuffling
- They give your cards a professional look
Use a corner punch with a 3mm or 1/8″ radius for standard cards.
If you want your cards to last, you need to protect them.
Card Sleeves
The fastest solution is using card sleeves:
- Select sleeves that match your card size (slightly larger than your cards)
- Insert cards carefully to avoid bending
- Use premium sleeves for cards that get handled often
Lamination
For maximum durability:
- Use pouches that are at least 5mm larger than your cards
- Leave a 2-3mm sealed border around each card
- Cut out with scissors or craft knife
- Re-round corners after cutting
Spray Coating
For a professional feel without the bulk:
- Lay cards on a flat surface in a well-ventilated area
- Apply 2-3 light coats of clear acrylic spray
- Let dry completely between coats (about 30 minutes)
- Allow 24 hours for final curing
Testing Your Cards
Don’t skip this step! Testing reveals issues you’d never notice otherwise.
Physical Testing
Put your cards through these tests:
- Shuffle test – Shuffle 50+ times to check durability
- Drop test – Drop from table height onto hard surface
- Light test – Hold up to light to check opacity
- Feel test – Get feedback on how they feel in hand
Gameplay Testing
Even more important:
- Have others play with your cards without explanation
- Watch for confusion about card information
- Note if players struggle to read text or understand icons
- Check if cards are easily distinguishable when fanned in hand
Advanced Tips for Pro-Quality Cards
Want to take your cards to the next level? Try these techniques:
Edge Coloring
Professional decks often have colored edges:
- Stack cards tightly between boards
- Apply alcohol-based marker to exposed edges
- Allow to dry completely before handling
Foil Accents
In 2025, DIY foiling has become much more accessible:
- Print your design with a laser printer
- Apply foil sheet over areas to be foiled
- Run through a laminator to transfer the foil
- Peel away excess foil to reveal accented areas
Textured Finishes
For that luxury feel:
- Apply clear embossing powder over specific areas
- Heat with a craft heat gun until the powder melts
- Allow to cool completely before stacking
Common Problems and Solutions
Let me save you some headaches with these troubleshooting tips:
Cards Stick Together
- Problem: Fresh ink causing cards to stick
- Solution: Dust lightly with cornstarch or baby powder, then wipe off excess
Visible White Edges
- Problem: Cut lines showing white cardstock
- Solution: Use colored cardstock that matches your design or edge-color as described above
Inconsistent Cuts
- Problem: Cards are slightly different sizes
- Solution: Cut one card perfectly, then use it as a template for the others with a craft knife
Blurry Images
- Problem: Low-resolution graphics
- Solution: Use vector images when possible or raster images at 300dpi minimum
Where to Find Resources
Don’t reinvent the wheel. Use these resources:
- Card Templates: The Game Crafter has free downloadable templates
- Icons and Graphics: Game-Icons.net offers thousands of free game icons
- Stock Images: Unsplash and Pexels provide free high-quality photos
- Design Inspiration: BoardGameGeek forums showcase other designers’ work
Conclusion
Creating professional-quality cards for board games requires attention to detail, the right materials, and a methodical approach. But the results are worth it.
Whether you’re prototyping your dream game, upgrading a beloved classic, or preparing for a small production run, these techniques will help you create cards that look and feel professional.
Remember that practice makes perfect-my first attempts at card making were disasters compared to what I can produce now. Don’t get discouraged if your first batch isn’t perfect.
Start small, learn from each attempt, and keep improving. Before you know it, you’ll be creating cards that look store-bought or better.
Now you know exactly how to make cards for board games that will impress your friends and elevate your gameplay experience. The only question is: what game will you create first?
Have you made cards for a board game before? What techniques worked best for you? Let me know in the comments below!