Want to create custom board game pieces but don’t know where to start?
Vous êtes au bon endroit.
How to make board game pieces is one of the most common questions I get from game designers and hobbyists. And I totally get it.
Whether you’re prototyping a new game or replacing lost pieces from your favorite board game, creating your own components can seem overwhelming.
Mais voilà :
Making board game pieces is way easier than most people think.
Dans ce guide, en tant que professionnel de la personnalisation fabricant de jeux de société, I’ll walk you through everything you need to know about creating professional-quality game pieces from scratch. From simple cardboard tokens to intricate 3D printed miniatures.
Ça vous dit quelque chose ? Entrons dans le vif du sujet.

Why Make Your Own Board Game Pieces?
Before we get into the how-to stuff, let me explain why you’d want to make your own pieces in the first place.
Cost savings. Professional game manufacturing can cost thousands of dollars. DIY pieces let you test ideas without breaking the bank.
Complete customization. You get exactly what you envision. No compromises.
Quick prototyping. Need to test a game mechanic tomorrow? You can have pieces ready tonight.
Replacement parts. Lost a crucial piece from your favorite game? Make a new one.
Creative satisfaction. There’s something deeply satisfying about holding a game piece you made yourself.
Le résultat ?
Learning to make your own game pieces gives you complete creative control over your projects.
Essential Materials for DIY Board Game Components
Here’s where most people get stuck.
They think they need expensive equipment and exotic materials to create decent game pieces.
Not true.
You can make amazing pieces with stuff you probably already have at home.
Budget-Friendly Materials
Cardboard and chipboard are your best friends for starting out. I personally recommend 60-point chipboard for tokens and standees1.
Foam sheets create thick, easy-to-handle pieces. Plus, they’re incredibly forgiving for beginners.
Paper and sticker sheets work great for simple prototypes. You can design pieces digitally and print them at home.
Wooden cubes and discs are available at most craft stores. They’re perfect for basic game tokens.
Premium Materials (When You’re Ready to Level Up)
High-quality wood like birch plywood gives your pieces that premium feel.
Resin for detailed miniatures and complex shapes.
Acrylique creates beautiful translucent pieces that catch the light.
Metal for weighted dice and luxury components.
Pro Tip: Start with cardboard and foam. Once you’ve mastered the basics, then invest in premium materials.
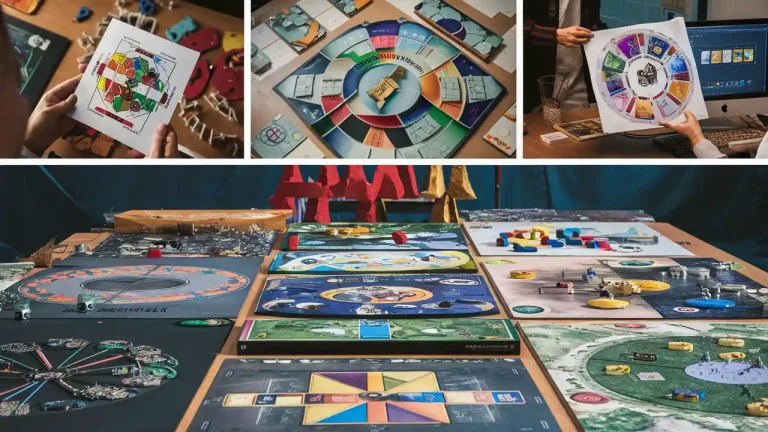
How to Make Board Game Pieces
Method 1: Quick Prototyping with Household Items
Let me start with the fastest way to get game pieces in your hands.
This method is perfect when you need to test a game mechanic ASAP.
Step 1: Raid Your Game Collection
Look for pieces from other games that you can repurpose:
- Chess pawns make excellent player tokens
- Poker chips work as currency or resources
- Checkers pieces are perfect for simple markers
- Dice from old games can represent random elements
Step 2: Use Everyday Objects
Buttons, bottle caps, and small coins all make excellent temporary game pieces.
I once prototyped an entire economic game using different colored buttons as resources. It worked perfectly for testing the core mechanics.
Step 3: Label Everything
Use small stickers or tape to label what each piece represents. This keeps your playtesters from getting confused.
Time investment: 15-30 minutes
Cost: Essentially free
Quality: Basic but functional
This approach lets you focus on game design rather than component creation.
Method 2: Cardboard and Chipboard Pieces
Here’s where things get more professional.
Cardboard pieces feel substantial and look polished. Plus, they’re incredibly versatile.
What You’ll Need
- 60-point chipboard (available at craft stores)
- Full-sheet sticker paper
- X-acto knife or rotary cutter
- Metal ruler
- Tapis de coupe
- Clear protective spray (optional)
The Process
- Design your pieces using any graphics software. Canva works great for simple designs.
- Print on sticker paper. This gives you the best adhesion to the chipboard.
- Cut the chipboard to size. Use a metal ruler and sharp blade for clean edges.
- Apply the stickers. Work slowly to avoid air bubbles.
- Seal with clear coat if you want extra durability.
In my experience, chipboard pieces can last through hundreds of game sessions when properly made.
The key is using quality sticker paper and taking your time with the cutting.
Pro Tips for Chipboard Success
Keep your blade sharp. Dull blades create ragged edges that look unprofessional.
Cut multiple pieces at once by stacking chipboard. Just make sure your blade is long enough.
For standees, cut a slit in one piece and a corresponding tab in another. They’ll interlock perfectly.
Method 3: Foam Sheet Components
Foam sheets are seriously underrated for game piece creation.
They’re thick enough to feel substantial, easy to cut, and come in tons of colors.
Why I Love Foam Sheets
Thickness. They feel more premium than cardboard.
Easy handling. The thickness makes them simple to pick up and move.
Color options. No need to paint – just choose the right color foam.
Forgiving. Mistakes are easy to fix.
The Foam Sheet Process
Print your designs on regular paper.
Cut out the paper templates.
Trace onto foam sheets using a pen.
Cut with scissors (yes, regular scissors work great).
Peel and stick if using adhesive foam.
I’ve made entire games using nothing but foam sheets and a good pair of scissors. The results surprised everyone who played the game.
Method 4: Wooden Game Pieces
Want to create pieces that feel premium right out of the gate?
Wood is your answer.
Pre-Cut vs. Custom Shapes
Pre-cut shapes (meeples, cubes, discs) are available from craft suppliers. They’re perfect for most games and save you tons of time.
Custom shapes require woodworking tools but give you unlimited design freedom.
For most indie game designers, I recommend starting with pre-cut shapes. You can always upgrade to custom pieces later.
Working with Pre-Cut Wooden Pieces
Sand lightly to ensure smooth surfaces.
Apply primer if you’re painting multiple colors.
Use acrylic paints for the best coverage and durability.
Seal with polyurethane for a professional finish.
Le résultat ?
Wooden pieces transform a game from “homemade” to “boutique publisher quality.”
Method 5: 3D Printing for Complex Pieces
3D printing has revolutionized custom game piece creation.
You can now create incredibly detailed pieces that would be impossible with traditional methods.
When to Use 3D Printing
Complex geometries that can’t be cut from flat materials.
Miniatures with fine details.
Interlocking pieces that need precise tolerances.
Small production runs where injection molding isn’t cost-effective.
Getting Started with 3D Printing
You don’t need to own a 3D printer. Many libraries and maker spaces have them available for public use.
Logiciel de conception like Tinkercad (free) or Fusion 360 (free for personal use) make creating models easier than ever.
Print services like Craftcloud let you upload designs and have pieces shipped to you.
I’ve used 3D printing for everything from custom dice to intricate miniatures. The level of detail possible is mind-blowing.
3D Printing Pro Tips
Start simple. Complex first prints often fail. Master the basics before attempting detailed miniatures.
Orient pieces carefully. The print orientation affects both strength and surface quality.
Use supports wisely. They’re necessary for overhangs but leave marks that need cleanup.
Choose the right material. PLA is easiest for beginners, but PETG offers better durability.
Advanced Techniques for Professional Results
Ready to take your game piece creation to the next level?
Here are some advanced techniques that separate amateur from professional-looking components.
Multi-Material Assembly
Combine different materials for optimal results:
- Wooden bases with acrylic tops for visibility
- Plastic bodies with metal cores for weight
- Fabric elements on rigid substrates for texture
Custom Tooling for Production Runs
If you’re making 50+ identical pieces, custom tooling becomes cost-effective:
- Die-cutting templates for cardboard
- 3D printed jigs for consistent assembly
- Laser-cut stencils for painting
Intégration numérique
Modern board games often include digital elements:
- NFC tags for app integration
- QR codes linking to digital content
- LED components for visual effects
These technologies are becoming more accessible every year.
Quality Control and Testing
Here’s something most guides don’t cover:
Your pieces need to survive actual gameplay.
Durability Testing
Test de chute pieces from table height 50 times.
Test de mélange des cartes cards and tokens through repeated handling.
Stack test pieces that need to support weight.
Spill test with common beverages (coffee, soda, water).
Sounds excessive? Trust me, players are rough on components.
In 2025, I’ve seen beautiful custom pieces destroyed in the first game session because they weren’t properly tested.
Consistency Checks
Measure dimensions with calipers to ensure uniformity.
Weigh pieces that affect game balance (like dice).
Check tolerances for pieces that need to fit together.
Small variations can ruin game mechanics.
Cost Breakdown: Budget vs. Premium
Let me give you some real numbers.
Budget Approach (Per 50 pieces)
- Cardboard tokens: $5-10
- Foam pieces: $8-15
- Time investment: 2-4 hours
Premium Approach (Per 50 pieces)
- Wooden components: $25-50
- 3D printed pieces: $30-75
- Time investment: 4-8 hours
The budget approach gets you functional pieces quickly. The premium approach creates components that rival commercial games.
Choose based on your goals and timeline.
Les erreurs courantes à éviter
After helping hundreds of designers create their first game pieces, I’ve seen the same mistakes over and over.
Skipping prototypes. Always test with cheap materials before investing in premium components.
Ignoring player feedback. Pieces that look great might feel terrible in actual play.
Overcomplicating designs. Simple, functional pieces often work better than elaborate ones.
Forgetting storage. Make sure your pieces fit in your game box with room to spare.
Rushing the finish. Taking time with sanding and sealing makes a huge difference in perceived quality.
Tools That Make Everything Easier
The right tools can cut your production time in half.
Essential Tools
- Sharp X-acto knives with replacement blades
- Metal rulers for straight cuts
- Self-healing cutting mats
- Papier de verre à grain fin
- Quality brushes for painting
Game-Changing Tools
- Rotary cutters for long straight cuts
- Corner rounders for professional edges
- Airbrush systems for smooth finishes
- Digital calipers for precise measurements
Pro Tip: Buy quality tools once rather than cheap tools multiple times.
Scaling Up: From Prototype to Production
Here’s what happens when your game takes off and you need hundreds of pieces.
Small Batch Production (50-500 pieces)
- Laser cutting services
- 3D printing farms
- Local woodworking shops
- Print-on-demand services
Large Scale Production (500+ pieces)
- Injection molding for plastic
- Die cutting for cardboard
- CNC machining for wood
- Professional manufacturing partners
The transition from handmade to manufactured is a big step. Plan for it early in your design process.
Conclusion
How to make board game pieces doesn’t have to be complicated or expensive.
Start with simple materials like cardboard and foam sheets. Focus on function over form in your early prototypes.
As your skills develop and your projects get more ambitious, gradually invest in better materials and tools.
The most important thing? Just start making stuff.
Every professional game designer started with their first homemade prototype. Yours might be rougher than you’d like, but it’s the foundation for everything that comes next.
Remember: the goal isn’t perfection on your first try. It’s learning the process and improving with each project.
Now grab some cardboard and start creating. Your game ideas deserve to exist in the real world.
What’s stopping you from making your first game piece today?