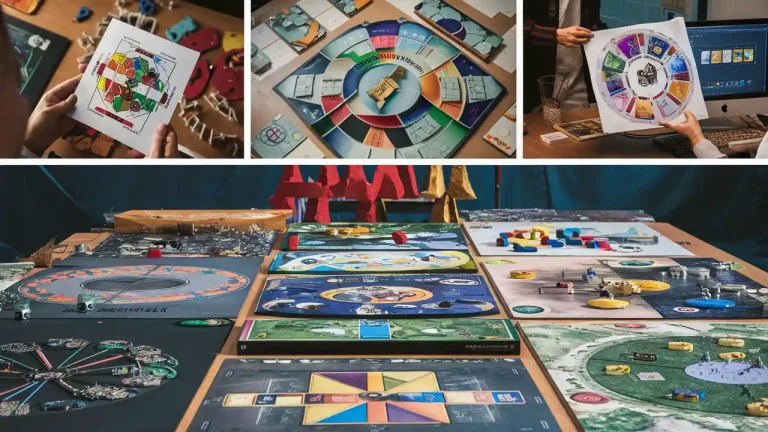
Ever wanted to create your own custom board game but worried about storage space?
Voici ce qu'il en est : How to make a foldable board game is easier than you think. And the best part? You can create a professional-looking game that folds into a compact size for easy storage and transport.
I’ve helped dozens of game designers and hobbyists create their own foldable boards over the years. And I can tell you this: most people overcomplicate the process.
Aujourd'hui, en tant que professionnel du sur-mesure fabricant de jeux de société, I’m going to walk you through the exact step-by-step process to create a durable, functional foldable board game from scratch.
Ça vous dit quelque chose ? Entrons dans le vif du sujet.

Why Make a Foldable Board Game?
Before we get into the nitty-gritty, let me explain why foldable board games are such a smart choice.
Storage is a massive issue. Most board game enthusiasts struggle with shelf space. A foldable design solves this problem instantly.
Portability matters. Whether you’re traveling or heading to a friend’s house, a compact game is always easier to transport.
Cost-effective production. If you’re thinking about mass production later, foldable boards are significantly cheaper to manufacture and ship.
Mais voilà :
Creating a foldable board that actually works requires understanding the mechanics of hinges and fold patterns. Get this wrong, and your board will either fall apart or look unprofessional.
Matériel essentiel dont vous aurez besoin
Let me be crystal clear about materials. This is where most people mess up.
Core Materials
Illustration Board (1/16-inch thick): This is your foundation. Don’t use corrugated cardboard – it creates bulky, unstable hinges that look amateur.
Book Binding Tape (2-inch wide): This creates professional-grade hinges. Duct tape works too, but binding tape looks cleaner.
Full-Sheet Printable Adhesive Labels: These let you print your game design directly onto the adhesive surface. Game-changer for professional results.
Tools You Can’t Skip
- Sharp craft knife with replaceable blades
- 24-inch metal ruler (minimum)
- Tapis de coupe
- Bone folder for crisp creases
- Computer and printer for artwork
Conseil de pro : Quality materials make a huge difference. I’ve seen too many people cut corners here and end up with boards that fall apart after a few games.
Planning Your Fold Pattern (This Is Critical)
Here’s where most beginners go wrong: they start cutting before planning their fold pattern.
The most common configurations are:
Bi-Fold Design
Simple center fold creating two panels. Perfect for beginners or smaller games.
Quad-Fold Design
Four panels that fold in a specific sequence. This is the gold standard for most commercial board games.
Six-Fold Design
Advanced pattern using six panels. Allows for very large game surfaces but requires careful planning.
My recommendation? Start with a quad-fold. It’s the perfect balance of size and complexity.
How to Make a Foldable Board Game
Alright, let’s get into the actual construction. I’m going to walk you through creating a standard quad-fold board measuring 24″ x 24″ when open.
Étape 1 : Conception du plateau de jeu
Before you touch any materials, create your board artwork at actual size.
Critical tip: Leave at least 1/4 inch margin on each side of fold lines. This prevents artwork from cracking or peeling at the hinges.
I personally recommend designing digitally. It gives you precision and the ability to easily make changes.
Step 2: Cut Your Panels
For a 24″ x 24″ quad-fold board:
- Cut four panels, each 12″ x 12″
- Sand edges lightly to remove roughness
- Test-fit panels together before proceeding
Precision matters here. Even small variations in panel size will cause alignment issues later.
Step 3: Apply Your Artwork
Print your design on full-sheet adhesive labels and carefully apply to each panel.
Here’s my technique:
- Work from one edge to the other
- Use a bone folder to eliminate air bubbles
- Slightly overlap artwork at panel edges (you’ll trim this later)
The bottom line? Take your time with this step. Rushing here leads to bubbles and misalignment.
Step 4: Create the Hinges (The Make-or-Break Step)
This is where the magic happens. And where most people screw up.
Place two panels face-down, edges touching, with a 1/8-inch gap between them. Apply binding tape across the gap, ensuring equal coverage on both panels.
Essential technique: Fold the hinge immediately after application while the adhesive is still workable. This prevents stiffness and ensures smooth operation.
For a quad-fold board, you’ll need three hinges total:
- Two connecting adjacent panels
- One connecting the center pair
Step 5: Test and Perfect
Fold your board through its complete sequence several times. The panels should align perfectly when closed and lie completely flat when open.
If you notice binding or misalignment, you may need to trim edges or adjust hinge placement.
Mais voilà : getting this right on the first try is rare. Don’t get discouraged if you need to make adjustments.
Advanced Techniques for Professional Results
Once you’ve mastered the basics, these techniques will take your board to the next level.
Fermetures magnétiques
Embed thin neodymium magnets in the board edges. Route shallow recesses with a craft knife and secure magnets with strong adhesive.
This keeps the folded board closed during transport and adds a premium feel.
Reinforced Corners
High-wear areas like corners benefit from clear packing tape reinforcement. Apply small triangular pieces to the back corners of each panel before assembly.
Multi-Level Folding
Some designs benefit from panels that fold at different levels. Create this effect by varying the gap width between panels during hinge application.
Wider gaps create looser folds that accommodate thicker sections.
Common Problems and How to Fix Them
Let me address the most common issues I see:
Hinge Failure
Problème : Tape separates from board after repeated folding.
Solution : Use higher-quality binding tape and ensure surfaces are completely clean before application. Consider fabric-backed tape for heavy-use games.
Alignment Issues
Problème : Panels don’t align properly when folded.
Solution : Check that all panels are identical in size and that hinges are applied with consistent spacing.
Artwork Damage at Folds
Problème : Printed surface cracks or peels at hinge lines.
Solution : Use flexible vinyl labels instead of paper-based adhesives, or apply clear protective tape over hinge areas.
Size Considerations and Scaling
Standard board game boxes accommodate folded boards up to 10″ x 10″ x 2″. Plan your panel size accordingly.
For larger games, consider six-fold or eight-fold patterns. But remember: each additional fold increases complexity and potential failure points.
Testing Your Board Game Design
Once your board is complete, extensive testing is crucial.
Durability testing: Fold and unfold your board at least 100 times. Note any wear patterns or hinge issues.
Gameplay testing: Use your board for actual games. Pay attention to how it performs under real-world conditions.
Storage testing: Make sure your folded board fits your intended storage solution.
Cost Breakdown and Time Investment
A typical DIY foldable board costs $8-15 in materials, compared to $30-60 for custom printing services.
Time investment? Approximately 3-4 hours for your first board, reducing to 1-2 hours with experience.
That’s a pretty solid ROI if you ask me.
Pro Tips for Long-Term Success
Store folded boards with light pressure to maintain crease integrity. A few books on top works perfectly.
If hinges begin to loosen, reinforce with additional tape rather than replacing entirely.
Consider lamination with clear adhesive film for extra protection, especially for games that will see heavy use.
Taking It to the Next Level
Once you’ve mastered basic foldable board construction, consider experimenting with:
- Integrated storage compartments
- Removable panel sections
- Modular designs that allow for game expansion
These advanced techniques open up new possibilities while maintaining the portability advantages of folding construction.
Le bilan
How to make a foldable board game comes down to understanding materials, planning your fold pattern, and executing with precision.
Start with a simple bi-fold design to learn the basics. Then work your way up to more complex patterns as your skills develop.
Remember: your first board won’t be perfect. Each project teaches valuable lessons about materials, techniques, and design considerations.
The satisfaction of playing a game on a board you crafted yourself? Totally worth the effort.
Now get out there and start creating. Your next favorite game could be just a fold away.